


In this blog post, I am going to look at Selenium, the tool of choice every QA engineer has in his toolkit. It is a web framework that runs assertions, that answers true or false questions, based on which assertions were used. This gives the developers and the QA engineers a better picture of how the user interacts with a site, thus making debugging simpler and more efficient.
Selenium works in a varieties of ways. You can use Selenium on your Firefox browser as an add-on to record activity being done in the browser, or you can use a standalone server to approach it in a more development-esque standpoint.
Most QA engineers will be looking to reproduce the workflow of a normal user to find errors or uncaught bugs to verify that the product is shipped properly. Selenium allows a formal record of these activities and allows the reiteration of these movements. You don't have to write tests over and over again to yield the same results. You can just save the current group of commands and reuse them for later. These are great for regression and smoke tests.
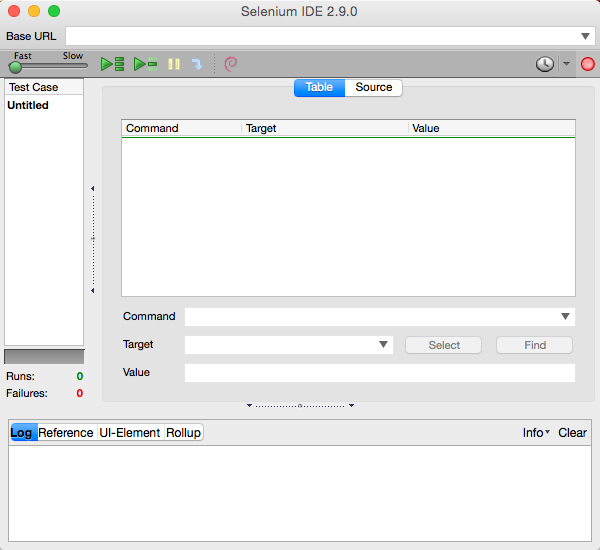
Get Selenium
Selenium IDE for Mozilla Firefox can be found here at the Selenium Downloads Page. Make sure you get the IDE version.
Our first test and recording actions
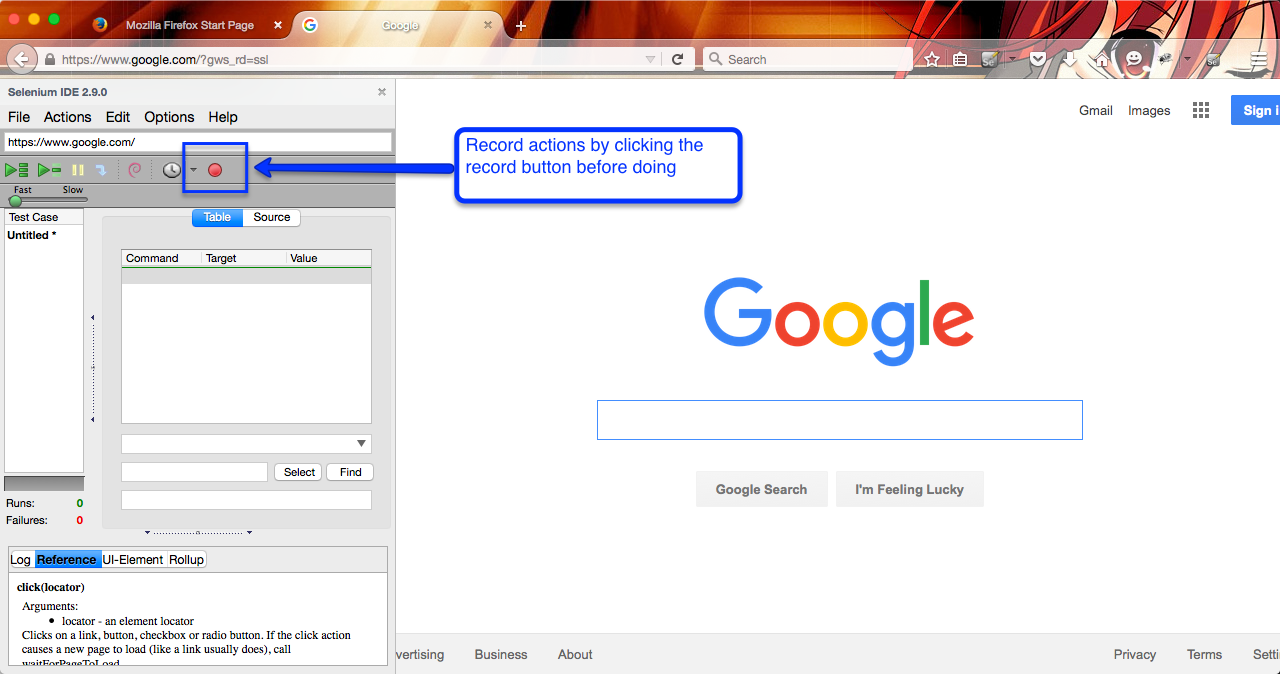
Here, we take Google as an example. Notice that the most noticeable, actionable item is the search bar. We can use selenium to replicate what a normal user would do.

First, we turn on recording to capture actions for the site. This is done by clicking the red button on the IDE.
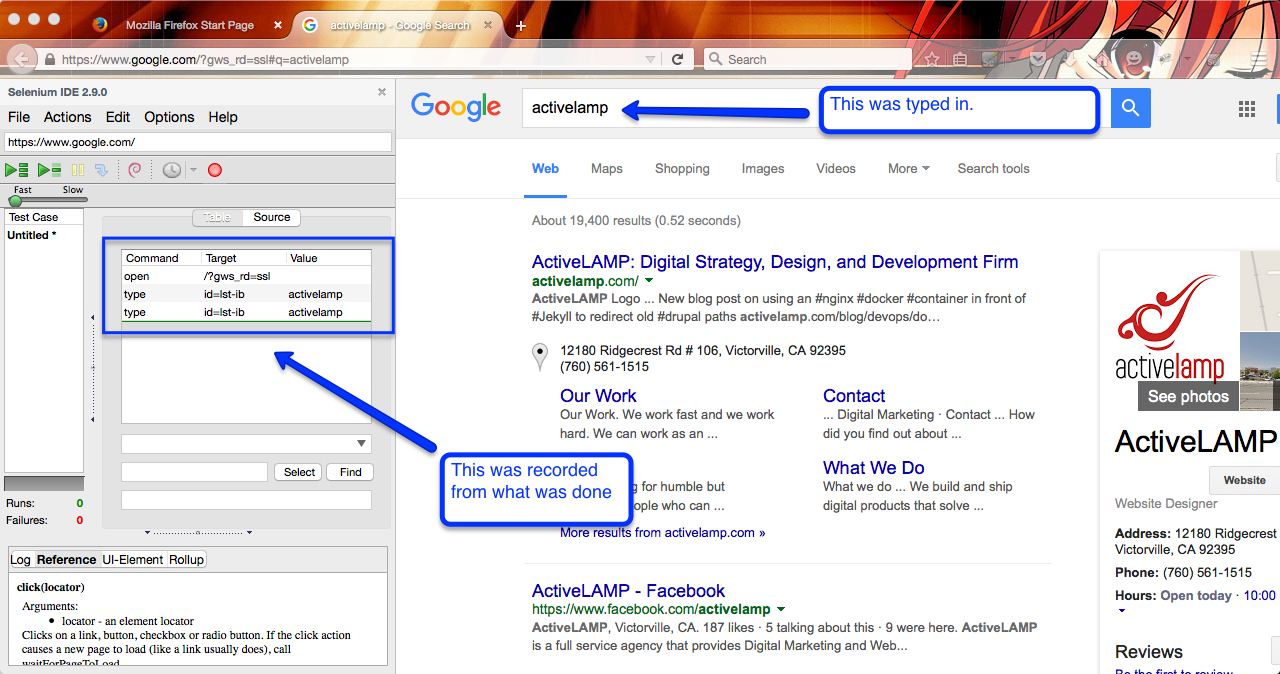
As soon as you're recording, simulate the user workflow as any normal user would. Notice that your actions are being recorded as soon as you do it. Type into the search bar whatever you want to search and notice the commands being recorded on the IDE.
Pass/Fail and Assertions
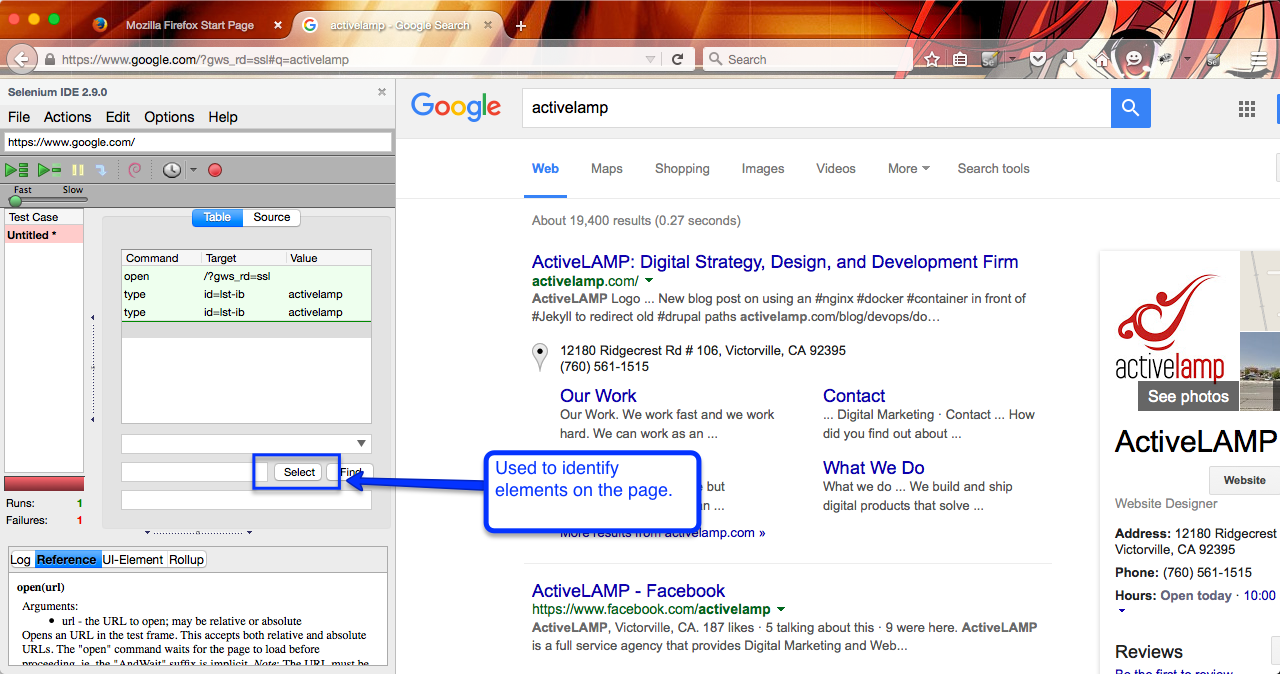
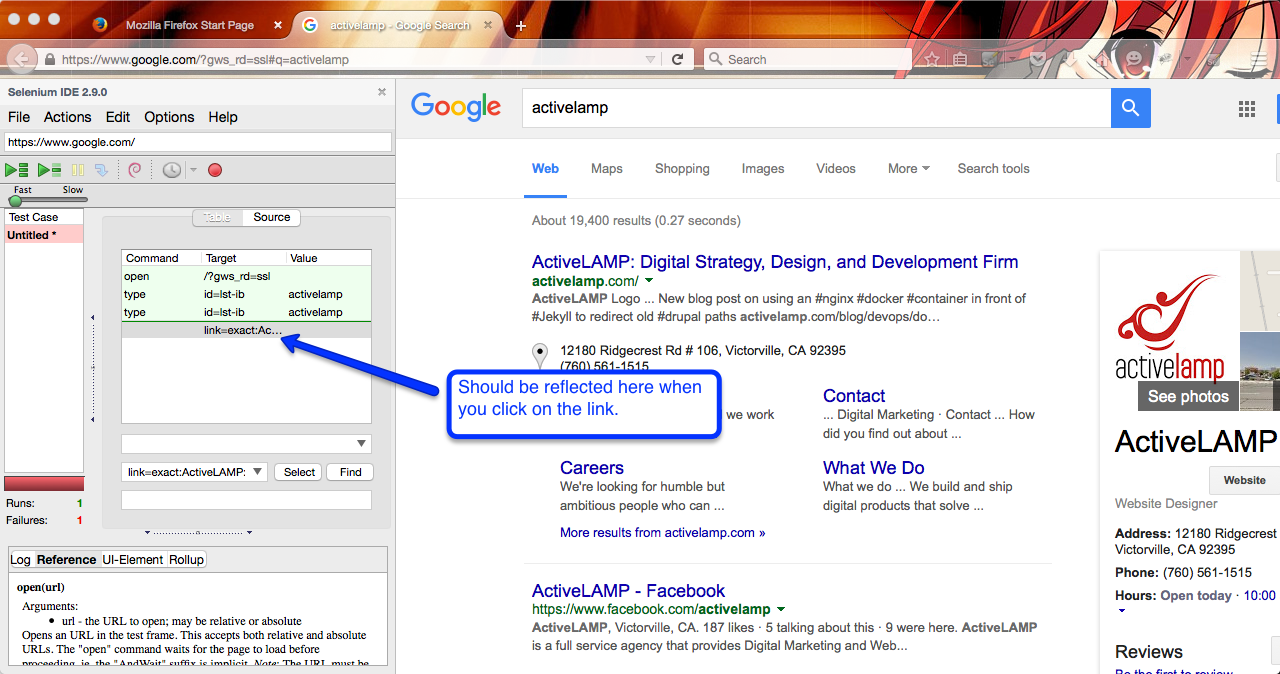
The next step would be is to find the results that you want, and ensure that it is what you "expected" from the previous actions. In this case, I want the first link to be our company website, activelamp.com. This can be easily executed by clicking the select button on the IDE, and clicking the first link on the browser. This records the object you are looking for into the group of commands.
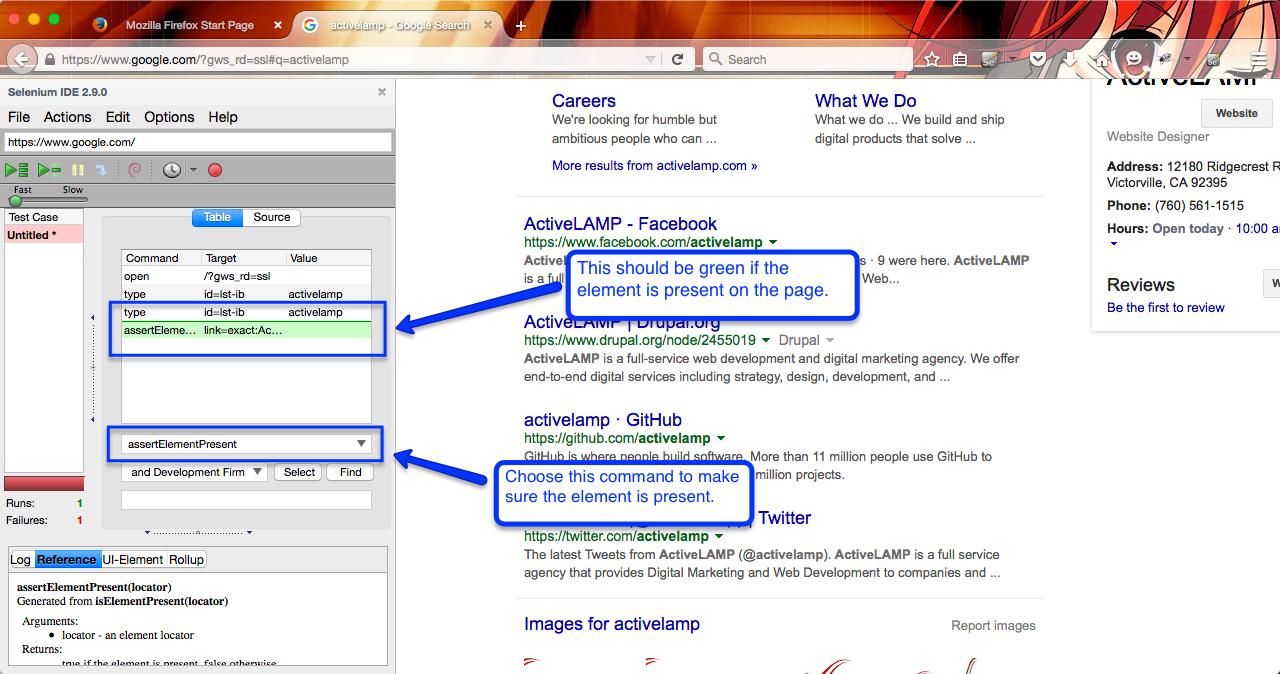
Finally, you want to tell the IDE "I want to make sure that this object is here". By doing so, the IDE will either return a green or red highlight, indicating a pass or a fail. To achieve this goal, highlight the previous object that was recorded, and select "assertElementPresent". This makes sure that the object is present on the page.
There you have it! You have written your first automated test.
In the upcoming months, I will talk more about Selenium from a beginner and developer standpoint, and offer different tips and tricks on how to create automated tests and how you can integrate it into your project.
If you have any questions, you can leave a comment below or send me questions at our twitter.
Authored by


Alfonso Joven
Quality Assurance Engineer
Alfonso loves playing video games, including World of Warcraft, League of Legends, and Dota2. When he's not hacking on a computer, or playing video games, he enjoys spending time with his wife and newborn son.